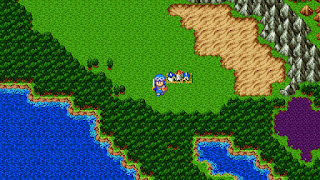
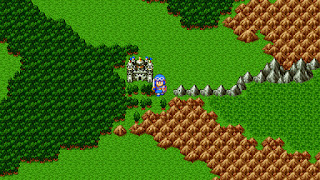
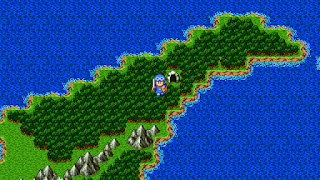
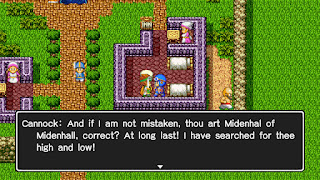
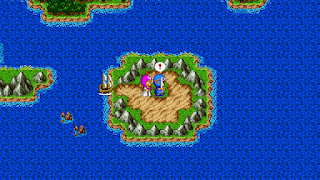
Welcome back to the world of Dragon Quest! The sequel to the game that more or less kickstarted JRPGs as a popular genre, Dragon Quest II: Luminaries of the Legendary Line is what you would expect from the series. It's a turn-based, globe-trotting, NPC-riddled journey to save the world from an ancient evil, and you're in charge of the three youths destined to stare calamity in the face.
In general the original Dragon Quest II (and Dragon Warrior II, its English-language port) plays the same as later incarnations of the game. That said, there are some key differences that make playing on the NES and playing on later systems a bit different:
- The majority of the items, spells, and locations have different names. The differences aren't so massive that you can't figure out what's what in this guide, assuming you're playing on the NES version.
- Many of the dungeon maps are different between versions. This guide provides directions for the later versions of Dragon Quest, primarily those for the Nintendo Switch and mobile phones. I highly recommend looking up maps for the NES version of the game, as the dungeons of Dragon Quest II are much more complicated to navigate than in the original Dragon Quest, and you'll get lost a lot if you go in blind.
- The overall difficulty and reliance on level grinding has been toned down in later versions of Dragon Quest II. Whereas the experience used to be rather opressive, it is now... well, less so. That said, this is still considered to be one of the hardest Dragon Quest games, so be ready for a challenge regardless of the version you're playing.
- Enemy stats and movesets have been tweaked. Of particular note is the final boss, who now lacks a spell that originally made it terrible to fight.
- In the original version you needed to access the menu to perform virtually any task, such as going up and down stairs, opening doors, talking to NPCs, and so forth. This is no longer the case in later versions.
This guide will pull all of its details and screenshots from the Nintendo Switch version of Dragon Quest II.
The Basics
Dragon Quest II is a turn-based RPG, and plays more or less the same as the original Dragon Quest. As you explore the game with your party of three adventurers you'll accrue experience, gain levels, learn new spells, and acquire better equipment. The stronger your party gets, the more of the game you can access, until eventually you track down and defeat the final boss. As you explore you'll run into bands of monsters, and when you slay them you'll receive experience and gold. Pretty standard stuff.
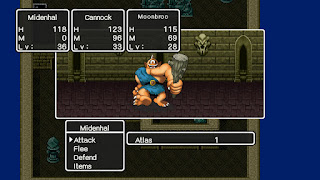
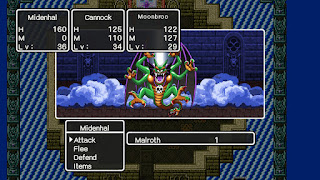
In terms of combat Dragon Quest II differs from the original thanks to multiple enemy combatants. Enemies tend to be organized into groups, and while you can target a group you cannot target specific enemies within that group. Your characters will choose their own targets. Enemies in groups always consist of their own kind, so if you're facing a battle with several different types of monsters you can more easily pick and choose which foe will receive damage.
Similar to Dragon Quest, you cannot save your game anywhere you like in Dragon Quest II. There are seldom any handy save points before a dungeon, and you can't save in the overworld. That said, your options in Dragon Quest II have expanded over the original, and you can save whenever you speak to the king in a kingdom, or to specific NPCs (usually old men near Churches). You'll gain a spell early on that will allow you to jump to these locations, so saving is not that difficult. In the later versions of the game you can also use Quick Saves, though this option is more limited.
As in Dragon Quest, your character only has ten slots for holding items, including their equipment. That said, each of your characters can hold ten items, for a new maximum of thirty items. A character can only use items from their own inventory in combat, so make sure you've distributed your items properly.
Naming
When you begin a new game of Dragon Quest II you'll be prompted to give a name to the Prince of Midenhall, your starting character. Later on you'll recruit the Prince of Cannock and the Princess of Moonbrooke, whose names are randomized - though you can change them if you wish. None of your party members have properly canonical names set as defaults, so for the purposes of this guide we'll refer to them by their kingdoms: Midenhall, Cannock, and Moonbrooke. (Though, ah, there isn't even enough room to use Midenhall and Moonbrooke as names. Just... don't worry about it.)
That's that. Ready to get started?
Midenhall
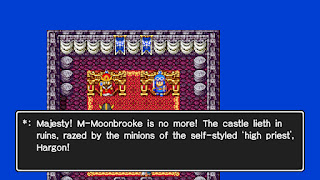
Dragon Quest II begins in the kingdom of Midenhall, though first you'll be treated to the destruction of another, nearby kingdom, and its loss spurs the Prince of Midenhall onward on his journey. A cruel fiend named Hargon plots to conquer the world, and you need to put a stop to his machinations. It's as good a plot as any.
Leave the throne room and the king will give you an opportunity to change the names of your two future companions, whom you won't recruit for a little while. The king will also present to you a chest containing 50 gold and a Copper Sword. Equip your Copper Sword right away, so you aren't fighting enemies with your fists when you leave Midenhall. Whenever you find items in the field you should similarly equip them immediately, just so you don't forget.
Midenhall is hardly enormous, and you should have a quick look around before you depart. There are a few things of note:
- If you leave Midenhall and reenter the king will return to his throne room. You can hereafter speak to the king and save your game. Die in combat and you'll be returned to the last place you saved, minus half your gold.
- In the northeast of the castle is a bricked-off area that you can enter by checking the gap in the wall to the north. Inside this room are two locked doors. These will be of importance later, so don't forget this little area.
- In the middle of the pond on the west side of the castle is a teleportal. It will send you... somewhere. This is of no use right now.
- Near the entrance of Midenhall you'll find an Inn and an Item Shop. The Inn will fully restore your character's HP and MP, while the Item Shop stocks a few useful items. You may want to grab a few Medicinal Herbs from the Item Shop before you leave Midenhall. Once you've fought in the field a few times you should also pick up the Leather Shield, which will make it easier to survive confrontations with the local monsters.
And that's all for Midenhall. Leave the castle via the edges of the map and you'll be headed to the wider world.
World Map - Midenhall Region - Enemies
- Dracky - 9 HP - Drops Oaken Club
- Iron Ant - 5 HP - Drops Medicinal Herb
- Maulusc - 8 HP - Drops Medicinal Herb
- Ratscal - 10 HP - Drops Medicinal Herb
- Slime - 5 HP - Drops Medicinal Herb
- Spirit - 12 HP - Drops Plain Clothes
When traveling between locations in Dragon Quest II you'll need to explore the world map. Whenever you take a step on the world map there's a chance that you'll get into a battle with one or more enemies. Defeating said enemies will earn you experience, and if you earn enough you'll leve up your characters. Leveling is key to making progress through Dragon Quest II, so for the most part you'll want to avoid running from battles.
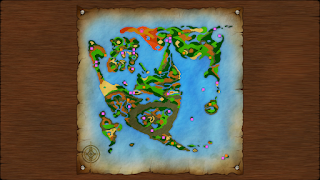
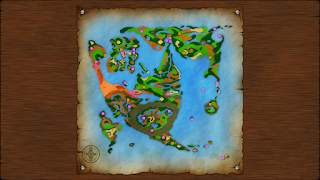
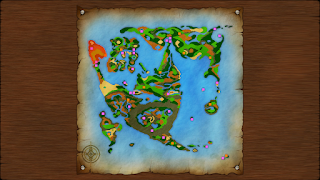
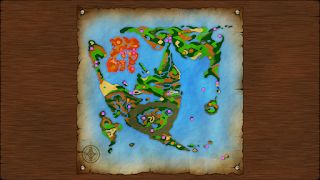
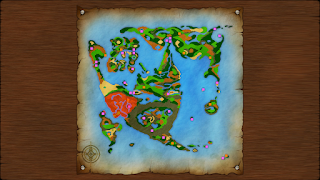
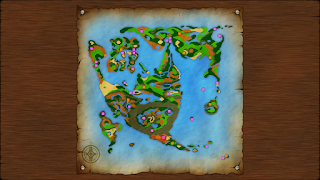
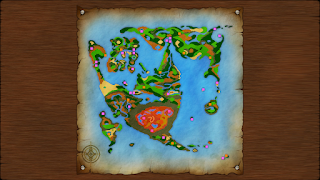
The world map consists of a few different types of terrain. Generally speaking, if you want to avoid excessive numbers of battles you'll want to stick to plains-like areas, which are generally grassy in nature. If you enter forests or hilly areas you'll be more likely to run into enemies. You can view the layout of the world via the World Map screen. (Which button takes you to the World Map varies from system to system. On the Switch it's the X button.)
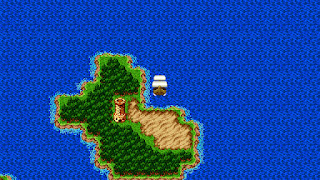
You can head either north or south from Midenhall. If you head south you'll eventually find your way to a small shrine on a patch of desert. Here an old man will advise you to seek out Gold and Silver Keys to aid in your journey, and suggests looking for the Silver Key first. You don't have to travel this way right now, though you will likely earn a few levels in the process. The enemies get a bit tougher if you head south, so make sure you have a few Medicinal Herbs in store before making the trip.
(Note that there's a second bridge just east of the bridge leading back to Midenhall. This leads to a heavily-forested area with stronger enemies. They will make mincemeat of the prince at your starting levels, so don't go this way yet. You'll be headed that direction soon enough.)
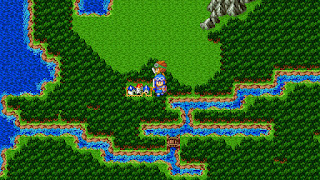
If you head north from Midenhall you'll soon be forced west. Walk the plains, tending more towards the south, until you see a patch of purple bog. These areas are poisoned, and will damage your party if you step on them. Best avoid this one. A short ways further west from the bog you'll find your next destination, the town of Leftwyne.
Leftwyne
A small settlement that serves as a resting place for travelers, Leftwyne is your first stop on your journey. There are a bunch of things to see in town before you set out again:
- To the left of the entrance is a small building with two NPCs. One runs an Item Shop, and you may want to pick up a Chimaera Wing from him, allowing you swift teleportation back to towns. The other runs a Bank, and you can leave money and items with her. Banks will allow you to get around the loss of gold if you're ever defeated in battle, and they're a great place for storing items you want to keep but have no immediate use for.
- To the right of the entrance of town is an Inn. It is one coin more expensive than sleeping in Midenhall, which is fine. Use this Inn to grind out a few levels for your prince.
- In the northeast of Leftwyne is a Church. Here you can remove status ailments, dispel curses, and resurrect fallen party members. Early in the game churches are your only means of reviving the dead, so expect to visit them regularly once you pick up the other members of the party.
- In the northwest of Leftwyne is a Weapon Shop. Here you can pick up new gear for your prince, though it is all costly. Eventually you'll want to get the Chain Sickle and Chain Mail (and if you're patient enough, you can kill monsters until you've got enough gold). If you check the second floor of the Weapon Shop you can find a Tombola Ticket inside a dresser. The Tombola Ticket just takes up space right now, and you may want to throw it in the Bank.
That's all for Leftwyne. If you didn't spend time leveling outside Midenhall you should probably do so now, as the monsters ahead are going to get tougher. Get the prince up to level 4 or 5 and you should be adequately prepared to head north, where the second kingdom of the game awaits.
Cannock
Three towns in a row? What a boon. Cannock is about the same size as Midenhall, so it won't take you long to look around:
- There's an Item Shop right by the entrance. The only addition here is Holy Water, which wards away weaker enemies. For the moment you shouldn't be using this stuff, as you need the levels.
- North of the Item Shop is the Inn. Nothing special here.
- In the east is the Church. Nothing special here either.
- In the northeast you'll find the chambers of the Princess of Cannock, who is... kinda rude. She'll nevertheless provide a small hint for locating her brother.
There are a few more things of note in Cannock, though they're locked behind doors. Head to the northwest to find the throne room, where the king will tell you that his son has already left town, headed to a place called the Wellspring of the Hero. You'll have to track him down yourself. As in Midenhall, the King of Cannock can save your game.
Despite what the King of Cannock says about his son, you won't be recruiting the lad just yet. Stock up on a few Medicinal Herbs and at least one Antidotal Herb, then head east of Cannock, along the coast, to find your first dungeon.
Wellspring of the Hero
Enemies
- Cobra King - 14 HP - Drops Antidotal Herb
- Dracky - 9 HP - Drops Oaken Club
- Iron Ant - 5 HP - Drops Medicinal Herb
- Maulusc - 8 HP - Drops Medicinal Herb
- Ratscal - 10 HP - Drops Medicinal Herb
- Slime - 5 HP - Drops Medicinal Herb
Ahh, baby steps. The Wellspring of the Hero is, for the most part, an easy little dungeon, and if you can handle the enemies outside you'll have no trouble with this place. The only new foe you'll face is the Cobra King, which have slightly more HP than everything else and can Poison your character. Still, no big deal.
The layout of the Wellspring of the Hero is quite simple, and you should have no difficulty making it through. Head northeast from the entrance until you hit the upper-right corner of the cave, then follow the western path to the end. There are a few things to note along the way, if you care to deviate from the main path:
- Go south at the first little body of water you encounter to find a chest. It contains a Medicinal Herb. If you take a right outside this chamber and follow the path south you'll eventually come to another chest, containing 71 gold.
- Check the darkened corridor a little ways north and to the right of the first pond and you'll find stairs. These lead to a little room with a soldier. Nothing of interest here, sadly, besides some conversation.
- Continue a short ways west of the final approach to the wellspring to find another chest. It contains an Antidotal Herb.
At the end of the cave you'll find an old man who will bathe you in the spring, restoring the prince's health. He'll then tell you that the Prince of Cannock just left, and is headed for Midenhall. You must speak to this old man, so don't miss out on him before you leave the cave.
Head back the way you came and leave the Wellspring of the Hero. Trek west, following the craggy mountains, and you'll find a slightly shorter route that allows you to bypass Cannock. Trek back to Midenhall to find the prince, however, and you'll discover from the king that he just left. How annoying. You must speak to the king while you're in Midenhall, so don't forget!
Head back towards Cannock, but make a stop in at Leftwyne before you arrive. Here, at last, you'll find the Prince of Cannock, sitting at a table inside the Inn. Speak to him and he'll join your party on the spot. Success! There are a few things you should note about the Prince of Cannock, right off the bat:
- He starts off at level 1. You'll want to get into a few battles to beef him up before departing for new lands.
- His equipment is subpar. At a minimum you should buy him a Leather Shield from the Weapon Shop in Leftwyne, if not a new weapon and armor.
- The Prince of Cannock is not as good a fighter as the Prince of Midenhall, and will usually take more damage in battle. That said, he starts off with the Heal spell, and will quickly gain a few more spells as you earn levels. Try to get him to level 3 at a minimum, so he knows Sizz, your first attack spell.
With the Prince of Cannock in your party you can depart the starter area of the game and make your way to Moonbrooke, the third kingdom. First, however, you may want to grab an optional - but very useful - item: The Silver Key.
World Map - Lake Cave Region - Enemies
- Army Ant - 12 HP - Drops Medicinal Herb
- Bubble Slime - 13 HP - Drops Copper Sword
- Cobra King - 14 HP - Drops Antidotal Herb
- Magus - 12 HP - Drops Cypress Stick
- Maulusc - 8 HP - Drops Medicinal Herb
If you follow the coastline west of Cannock you'll eventually find a small lake with an island in the middle. This is the Lake Cave, an optional dungeon that will lead you to the Silver Key. The Lake Cave is a great place to get Cannock a little caught up with Midenhall, in terms of levels...
... though you need to use caution. The enemies out this way are more dangerous than those you've faced up to this point, and if you aren't of a sufficient level - or at least outfitted with solid gear - you may get your butt handed to you. The enemies you face change as you pass through the craggy mountains west of Cannock, and you may want to stay on the border and build up levels, retreating to Cannock whenever your health gets low. Antidotal Herbs will prove useful, as the enemies in these parts are likely to Poison your characters.
Get Cannock up to around level 5 and you should be ready to tackle the Lake Cave.
Lake Cave - Enemies
- Army Ant - 12 HP - Drops Medicinal Herb
- Bubble Slime - 13 HP - Drops Copper Sword
- Cobra King - 14 HP - Drops Antidotal Herb
- Fat Rat - 15 HP - Drops Chimaera Wing
- Healslime - 20 HP - Drops Tombola Ticket
- Magus - 12 HP - Drops Cypress Stick
- Sentripede - 17 HP - Drops Leather Armour
- Somnol Ant - 14 HP - Tombola Ticket
The Lake Cave is another straightforward dungeon, like the Wellspring of the Hero, though it's a bit longer, the enemies are tougher, and there are more places to check off the beaten path. Of particular note are the Magus enemies, which can cast Sizz and should be priority kills.
Navigation through here is simple. Head west along the main path until you can't go any further west, then go south to find stairs. Head south as far as you can on the lower level to reach the end. You can find a few items if you wander away from your objective a bit:
- The first chest you spot in a side room, near the entrance, contains a Seed of Agility. Seed items grant permanent stat boosts to a single character, and should be used immediately after you collect them.
- Head south and take a right at the first pond you come across, on the first level, to find another chest. It contains a Tombola Ticket.
- In the basement of the Lake Cave you'll find a straight passage south with a number of blind side passages. The first right leads to a Seed of Life, the second left leads to an Antidotal Herb, and the third left leads to a Chimaera Wing and 259 gold.
If you follow the southbound passage in the basement as far south as you can go you'll eventually come to a tiny pond, and the Silver Key is sitting next to the water. Snag it, then backtrack out of the cave.
The Silver Key
Now that you have the Silver Key you can access a few areas that were previously inaccessible. Alas, there's nothing terribly interesting just yet:
- The Silver Key will get you into the dungeon of Midenhall, in the northeast of the map. That said, you need another key to do anything here, so...
- There are two locked rooms in the northwest of Midenhall, both of which contain NPCs. The room on the left also has a dresser, and you can check it for a Tombola Ticket.
- Speaking of Tombola, if you check the Weapon Shop in Leftwyne you'll find a locked door. Behind it is a vendor who will play Tombola with you. And while we're on the subject...
Tombola
Yes, those Tombola Tickets you've been picking up serve a purpose. Hand one over to the Tombola guy in Leftwyne (you'll need the Silver Key, as noted above) and you'll receive a chance to play the 'Great Game', which is a glorified slot machine. Line up three symbols with good button press timing and you'll win a prize. The prizes you can win are as follows:
- Two matched symbols - Tombola Ticket
- Three Hearts - Medicinal Herb
- Three Slimes - Banishing Bell - Reduces the chances of Snooze and Fizzle spells from working on the bearer
- Three Stars - Prayer Ring - Restores MP when used
- Three Moons - Wizard's Staff - A weapon that casts Sizz when used
- Three Suns - Loyalty Card - Reduces item prices at stores when held
Most of these items are quite good, and given the relative scarcity of Tombola Tickets in the game (at least early on) you may want to save before trying your luck at Tombola. Reload if you don't like the results. You can receive Tombola Tickets a few different ways:
- Found in chests
- Found in dressers in towns and cities
- Given at random by merchants when you buy something
- Dropped by a few later-game enemies (Chewlip, Deadnaut, Dragonfry, Somnol Ant, Orc King)
Note that you don't need anything granted by Tombola to complete Dragon Quest II, as everything short of the Loyalty Card can be found elsewhere in the game. If your Tombola luck is poor (or you just can't be bothered) you'll get by just fine without playing the slots.
World Map - Moonahan Region
Enemies
- Army Ant - 12 HP - Drops Medicinal Herb
- Drackmage - 10 HP - Drops Oaken Club
- Fat Rat - 15 HP - Drops Chimaera Wing
- Magus - 12 HP - Drops Cypress Stick
Whether you made the trip to the Lake Cave or not, your next stop after recruiting the Prince of Cannock is a little shrine to the southwest of Cannock. With the prince in your party the guards in the shrine will allow you to pass, and the shrine will take you into an underground tunnel. The tunnel is full of familiar monsters, more or less the same as you fought in the Lake Cave, and shouldn't present a problem.
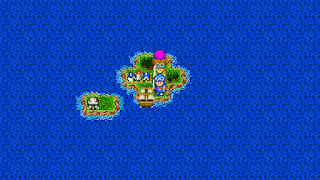
The tunnel has two exits. The first is to the left of the entrance, then south. It will put you on a useless little island on the world map. The second, proper exit is south of the entrance stairs, then to the left. It, too, will put you on the world map, though you can actually travel once you exit.
The world map will force you to travel south when you exit the shrine. Follow the path until you start seeing trees, and soon enough you'll arrive at your next stop, the little town of Moonahan.
Moonahan
Another waypoint on your journey, Moonahan is small and easy to explore. You'll find the following points of interest as you look around:
- The Inn is right by the entrance. You're probably hurt after the walk to Moonahan, so don't forget to stop in and rest.
- The Item and Weapon Shops are in the southeast of Moonahan. The Item Shop has nothing special, but the Weapon Shop has a few new items that are exceedingly expensive for this point in the game. At a minimum you should buy Iron Lances and Chain Mail for your two princes, if you have enough coin saved up.
- On the east end of Moonahan is a Tombola vendor. Play to your heart's content.
- In the northeast you'll find the Church. The Bank is tucked away in the upper-right corner of the Church.
- Next to the Church is an unassuming old man. Surprisingly enough, he will permit you to save your game if you speak to him. Handy!
Moonahan has a locked door that you can't yet open, as well as an old man by a fire that you can't yet reach. You may also notice a dog in the north that will follow you around if you speak to it. This dog is much more important than it may seem at first, and we'll get to it shortly. First, though, you need to get a particular item.
World Map - Moonbrooke Region
Enemies
- Badboon - 40 HP - Drops Oaken Club
- Bubbe Slime - 13 HP - Drops Copper Sword
- Corpse Corporal - 60 HP - Drops Leather Armour
- Drackmage - 10 HP - Drops Oaken Club
- Dragonfry - 15 HP - Drops Tombola Ticket
- Healslime - 20 HP - Drops Tombola Ticket
- Magus - 12 HP - Drops Cypress Stick
- Sentripede - 17 HP - Drops Leather Armour
- Smog - 12 HP - Drops Plain Clothes
- Somnol Ant - 14 HP - Tombola Ticket
If you head south of Moonahan you'll find a bridge leading to a new region, with new enemies. Head west / southwest of this bridge and eventually you'll arrive at Moonbrooke, the castle you saw getting destroyed at the beginning of the game. Speak to the flame spirit in the throne room and you'll learn what happened to the Princess of Moonbrooke. You don't have to do this right now, so you may want to skip entering Moonbrooke altogether, as there are no accessible items.
That said, you should still travel until Moonbrooke is within sight. Once it is, veer east and travel until you see a bridge. Next to the bridge is a little patch of poison, and in it is a sparkling item. Check it to receive Ra's Mirror. Head back to Moonahan with the mirror in hand and use it beside the dog in the north of town. (Note that you can't speak to the dog first. Enter the menu and use Ra's Mirror as an item.) The mirror will shatter...
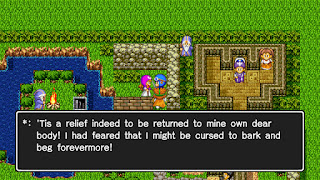
... and the dog will transform into the Princess of Moonbrooke. Huzzah! The princess will join the party, and your merry band will be complete. There are a few things to note about the princess:
- She is not a great physical fighter, and won't hit hard if you use her to Attack. The Princess of Moonbrooke excels at spells, and you'll want to get her to at least level 4 so she knows the Woosh spell and can fight. Woosh is excellent for quickly clearing groups of enemies early in the game.
- She starts off at level 1, just like the Prince of Cannock. Spend some time south of Moonahan leveling her up. Level 5 or 6 should be enough to keep her alive through the next area.
- She starts off with terrible equipment, and can't wear anything from Moonahan, aside from the Divine Dagger. Be prepared for the Princess of Moonbrooke to get knocked out a few times early on as she's coming into her own.
- If you take her to Moonbrooke you'll get a slightl different bit of dialogue by speaking to her father's spirit. Sad.
Once you've beefed up the princess to your satisfaction you'll want to head to Moonahan, then travel east, ignoring the bridge to the south. There's another bridge here, and you want to ignore it as well. Veer north and travel through the forests until you find a third bridge. This leads to a snaking, southbound passage along the coastline. Follow the path until you reach an island covered in hills, then go one more island south. Head west when you see a stretch of sand and you'll soon wind up at your next destination. Try to preserve your MP along the way, as there's a dungeon waiting.
Pillar of Winds - Enemies
- Badboon - 40 HP - Drops Oaken Club
- Corpse Corporal - 60 HP - Drops Leather Armour
- Dirty Rat - 25 HP - Drops Medicinal Herb
- Drackmage - 10 HP - Drops Oaken Club
- Dragonfry - 15 HP - Drops Tombola Ticket
- Healslime - 20 HP - Drops Tombola Ticket
- Killipede - 20 HP - Drops Leather Shield
- Magus - 12 HP - Drops Cypress Stick
- Smog - 12 HP - Drops Plain Clothes
- Somnol Ant - 14 HP - Tombola Ticket
- Spirit - 12 HP - Drops Plain Clothes
The first 'complicated' dungeon you'll come across in Dragon Quest II, the Pillar of Winds will introduce you to one of the most obnoxious obstacles in the game: Stairs that lead nowhere. You'll have to contend with useless, dead-end pathways a lot going forward, and the Pillar of Winds gives you a taste of what's to come. Still, it isn't that difficult to navigate, with a bit of help.
Progression through the pillar is pretty simple: Ignore all the stairs in the middle of the tower and go for the stairs in the northeast on the first floor. Everything else leads to a dead end near the top. There are a few things to snag along the way, if you care to walk off the beaten path:
- Walk straight through the first floor of the dungeon to the south end. There's a chest containing a Medicinal Herb on your right.
- There's a man right beside you when you emerge onto the second floor from the northeastern stairs. He will warn you about straying too close to the edge of the tower. If you do this at any point you'll be dropped out of the Pillar of Winds and have to start over.
- Along the main path on the second floor you'll find a chest, to the right of the stairs to the third level. The chest contains 315 gold.
- On the south end of the fourth floor you'll find two sets of stairs to the east of the entry point, assuming you've followed the proper path through the dungeon. The middle stairs lead to your destination, while the eastern-most stairs lead to the top of the tower. If you proceed to the top of the tower you'll find a chest containing a Prayer Ring. This item can be passed back and forth between Cannock and Moonbrooke and used to restore their MP, though there's a small chance it will break and disappear from your inventory. Fair warning!
Take the central stairs along the southern path on the fourth floor of the dungeon and you'll find a series of paths that will eventually lead you to the Windbraker. You'll need this item to access the next section of the game, so stow it away in someone's inventory. Now that you have the Windbraker (and the Prayer Ring - it's optional, yes, but you shouldn't leave it behind) you can backtrack to a ledge and drop out of the Pillar of Winds to the world map.
World Map - Dragon's Horns Region - Enemies
- Badboon - 40 HP - Drops Oaken Club
- Chewlip - 32 HP - Drops Tombola Ticket
- Dirty Rat - 25 HP - Drops Medicinal Herb
- Drackmage - 10 HP - Drops Oaken Club
- Metal Slime - 4 HP - Drops Iron Helmet
- Mummy Boy - 46 HP - Drops Plain Clothes
First thing's first: Return to Moonahan, hopefully via Cannock's Zoom spell (level 10). The trip to the Pillar of Winds will have put your party through the wringer, and you'll want to heal. In all likelihood you faced down doens of battles getting the Windbraker, so you should also outfit your party with the more expensive gear available in Moonahan. The Steel Broadsword, Full Plate Armor, and / or Steel Shield will all make the Prince of Midenhall a force to be reckoned with.
Leave Moonahan and travel to Moonbrooke. A little ways west of Moonbrooke is a bridge, and it leads to an island with a shrine. In the shrine you'll find a priest who will provide the usual services of a Church. Also here is a locked door that you can't open yet (it's hidden on the other side of the bridge near the priest) and some stairs. The stairs will take you to a new region.
As ever, you'll start running into new enemies around here. Of greatest importance among them are Metal Slimes. A recurring enemy in Dragon Quest, Metal Slimes are highly evasive enemies that take very little damage from physical attacks (if you hit them in the first place) and no damage from magic. They're also prone to running away every round. If you can manage to defeat one, however - usually via a lucky critical hit - you'll receive a whopping 1,015 experience.
Head west from the shrine and you'll find a huge desert. Travel northwest through the desert until you start to see grass again. Follow the grasslands north and you'll eventually come to a pair of towers.
Dragon's Horns - Enemies
- Badboon - 40 HP - Drops Oaken Club
- Chewlip - 32 HP - Drops Tombola Ticket
- Corpse Corporal - 60 HP - Drops Leather Armour
- Dirty Rat - 25 HP - Drops Medicinal Herb
- Drackmage - 10 HP - Drops Oaken Club
- Healslime - 20 HP - Drops Tombola Ticket
- Killipede - 20 HP - Drops Leather Shield
- Madusa - 42 HP - Drops Antidotal Herb
- Metal Slime - 4 HP - Drops Iron Helmet
- Shaman - 40 HP - Drops Banishing Bell
This dungeon is as straightforward as they come. All you have to do is climb... and climb... and keep climbing, until you run out of tower. Avoid the black chasm in the middle of each floor or you'll fall back to the first floor.
At the top of the Dragon's Horns southern tower you'll find a floor with a soldier. He will tell you to equip the Windbraker and leap off of the tower, via a gap in the northwestern wall. Put the Windbraker on one of your party members - be sure to actually equip it, not just place it in their inventory - then head north through the gap. If you jump west you'll fly out the wrong direction and have to start over. Drop to the north, however, and you'll land beside the northern tower of Dragon's Horns.
At this point you should make tracks to the northeast of Dragon's Horns, where you'll find the town of Rippleport. Once you've logged Rippleport as a teleportation destination - not to mention healed yourself up - you can head to the northern tower of Dragon's Horns. It's much easier to climb, and can be used to leap back the way you came. There's no point in returning to the southern tower... but you can grab the Celestial Skein that's sitting on the third floor of the northern tower. You'll want the Celestial Skein for later in the game, as it is used to make a great piece of armor. Stow it in a Bank for now.
World Map - Rippleport Region - Enemies
- Big Badboon - 38 HP - Drops Medicinal Herb
- Chewlip - 32 HP - Drops Tombola Ticket
- Corpse Corporal - 60 HP - Drops Leather Armour
- Mud Mannequin - 28 HP - Drops Holy Water
- Sekerleton - 40 HP
- Shaman - 40 HP - Drops Banishing Bell
Not much to see here. Northeast of the Dragon's Horns you'll find Rippleport, your next destination. To the north, through the mountains, you'll find a tiny shrine. Inside is a locked door, as well as an old man who will provide a hint to the location of the Gold Key. He's of no use beyond the hint, so you might as well head to Rippleport.
Rippleport
Rippleport is a pretty normal little town. Have a quick look around before proceeding with the plot:
- Inside the Church at the entrance of town you'll also find an old man who will save your game. Handy.
- Just north of the Inn, which is beside the entrance, you'll find a Tombola vendor. Play away if you have any Tombola Tickets.
- In the northwest you'll find an Item Shop and a Weapon Shop. The Item Shop sells Banishing Bells, which you can equip on your characters to ward off Snooze and Fizzle. The Weapon Shop has a bunch of new items you should buy, if you can afford them. In particular you should grab a Cloak of Evasion for the Princess of Moonbrooke. The Wizard's Staff is also quite handy, though rather pricey.
- In the alley beside and behind the Weapon Shop you'll find the Bank. There's no further use for it, so you may want to stow the Windbraker in here. The same goes for the Celestial Skein, if you grabbed it from Dragon's Horns.
This leaves two more things to check in Rippleport, and they're connected. First is a girl in the northwest, who is being accosted by monsters. Defeat the two Gremlins that attack (60 HP each) and the girl will introduce you to her grandfather. Grateful, he'll agree to let you use his ship, which you can use to expore the oceans of Dragon Quest II.
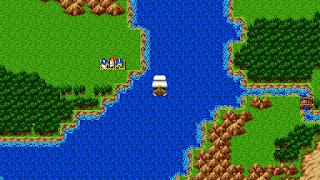
Hop onto the boat. If you sail south you'll find a locked door that you can open with the Silver Key. Inside is a man who will promise a reward if you bring him some of his lost possessions, swallowed by the sea. In the north is the path you can use to exit Rippleport in the boat.
World Map - Sailing - Enemies
- Drackmage - 10 HP - Drops Oaken Club
- Gargoyle - 60 HP - Drops Iron Helmet
- Hawk Man - 60 HP - Drops Devil's Tail
- Man o' War - 20 HP - Drops Chimaera Wing
- Merlusc - 32 HP - Drops Copper Sword
Exploring the wide world by boat opens up the majority of the world of Dragon Quest II, and in some cases you can get a head start on some things that won't matter just yet. We'll explore these areas shortly.
There are a few things to note about sailing in the boat:
- You will still run into random battles in the boat. Fortunately, you usually won't run into them quite as often as when you're walking around.
- If you use a Chimaera Wing or the Zoom spell to jump to a town the boat will follow you. You'll find the boat docked a short walk away from the town. The one exception is Rippleport, where you'll instead find the boat docked in town, where you first found it.
- The world map loops around on itself. If you sail off the south end of the map you'll jump to the north end, and if you sail too far east you'll wind up in the west.
Return to Rippleport once you've had your fill of random boating. By now you've probably run into a number of doors that are stubbornly locked, and you'll want a solution to this problem. Time to find the Gold Key.
The Gold Key - Zahan
To find the Gold Key you need to travel to the tiny fishing village of Zahan. Zoom to Rippletide, said north until you're in the open ocean, and then start zig-zagging your way to the northwest. Eventually your boat will travel beyond the edge of the map and reappear in the southeast of the world. Keep traveling northwest and you'll eventually wind up at Zahan. (You'll also find a shrine with a teleportal leading to Midenhall. Yes, this is the town you probably saw at the beginning of the game.)
There's not a ton to see in Zahan at this point, besides an Inn in the west and an Item Shop in the east. The shrine in the north is full of damaging tiles, and without a specific key (not the Golden Key) you can't open the doors inside. The only thing of particular note right now...
... is the dog, standing outside the Item Shop. Speak to the dog and it will walk to the right, revealing a sparkle. Check the sparkle for the Gold Key. With this you can now open doors with a gold-tinged frame. This opens up possibilities throughout the world, and we'll do a quick revisit of a number of locations:
- There's a locked treasure vault on the east side of Midenhall. Pop it open with the key to receive a Medicinal Herb, a Seed of Life, 1,236 gold, a Seed of Strength, a Seed of Magic, and the Mark of Erdrick. The Mark of Erdrick in particular is worth grabbing.
- In the center of Cannock is a locked room with a chest and an old man. Pop open the door and you'll find Erdrick's Shield inside the chest. This is an excellent piece of defensive equipment for the Prince of Midenhall.
- In the north of Moonahan is a small building you can now unlock. It leads to a jail cell of monsters, as well as an old man by a fire. The old man provides a vital clue for later in the game.
The Gold Key will grant you access to a bunch of doors in upcoming areas. Alas, it still will not get you through jail cell doors. For that we'll need to grab one more key, and now's as good a time as any.
The Jailor's Key - Burrowell
Zoom to Cannock and head north to find your boat on the coast. Use the boat to sail north, into the open ocean, and keep going until you wrap around to the south end of the world map. Continue north until you reach a shoreline. West of the landing point you'll find a town... of sorts, anyway. You'll need the Gold Key to enter and look around.
Yes, Burrowell is entirely underground, and it appears the townsfolk have taken this measure to evade the eyes of Hargon. There's a bunch of useful stuff to get in Burrowell:
- In the north of Burrowell is the Weapon Shop. This place sells some of the best weapons and armor in the game, albeit at extremely high prices. This includes the Aurora Blade, the best weapon you can get for the Prince of Cannock, and a solid weapon for Midenhall as well. The only item you probably won't want to pick up here is the Mink Mantle, which is waaaaay too expensive for the defensive boost.
- In the northwest is an old man who will tell you of someone named Don Calico, who lives in the town of Slewse. We'll get to Calico soon enough.
- In the central building you'll find an Item Shop and the Bank in the north half. The town's Tombola vendor is in the south half of the building.
All that said, the real reason we're here is found in the eastern Item Shop. If you speak to the owner you'll see there is an entry consisting entirely of question marks. If you purchase this secretive item - which is 2,000 gold - you'll receive the Jailor's Key. You can buy multiple of the key, but you only need one.
The Jailor's Key unlocks jail cells the world over, and you can start by unlocking the cells in the northeast of Burrowell, which also requires the Gold Key. If you check the right wall of the cell on the right you'll find the hiding place of an infamous thief named Roge Fastfinger, who, caught, will give you the Floodgate Key. This only serves a single purpose, but it is worth pursuing. We'll get to the Floodgate Key in a later town.
Now that you have the Jailor's Key it is worth your time to return to previous areas and put it to use. You'll find a bunch of useful items.
- In the northeast of Midenhall, accessibe via a Silver Key door, you'll find stairs down to a dungeon. There's a prisoner here who will tell you of the Soul Sigil if you free him, and if you use Safe Passage (Cannock learns it at level 17) you can cross the blue floor to the south and enter another cell. Try to speak to the priest in here and you'll find a Seed of Agility. The priest is actually a Wrecktor (180 HP), and if you can defeat this powerful enemy you'll receive a Lightning Staff.
- If you enter the Gold Key door in the north of Moonahan you'll find a jail cell containing Grimlins (69 HP). Defeat them and you'll find the Water Sigil in their cell. The Water Sigil - along with four other Sigils - is a required item for beating the game. Note that it does not take up space in your inventory, and appears as a symbol at the bottom of your characters' Status screens.
- In the north of Zahan is a shrine with blue, damaging floors. Use Safe Passage (Cannock learns it at level 17) to cross the floors without damage and you can get at jail cell doors in the east and the west. Both enclosures contain chests, and you'll find a Prayer Ring in the east and the Subtle Shuttle in the west. The Subtle Shuttle will come in handy shortly, assuming you also have the Celestial Skein.
The Jailor's Key will also grant you access to a bunch of other stuff in towns we haven't yet visited, assuming you're following the guide.
At this point you're poised and ready to find the remaining Sigils and complete the game. For the next few sections we will bop back and forth between mandatory and optional areas, and we'll start with a land that will look familiar if you played Dragon Quest. It also just so happens to be right next door to Rippleport.
World Map - Alefgard Region - Enemies
- Big Badboon - 38 HP - Drops Medicinal Herb
- Drackmage - 10 HP - Drops Oaken Club
- Gnashturtium - 46 HP - Drops Antidotal Herb
- Gremlin - 60 HP - Drops Chimaera Wing
- Metal Slime - 4 HP - Drops Iron Helmet
- Sabrecat - 25 HP - Drops Copper Sword
- Smog - 12 HP - Drops Plain Clothes
Zoom to Rippleport and you'll find the realm Alefgard a short sail to the east. Alefgard is substantially smaller than it was in Dragon Quest, though you can still visit a few areas that were of interest in the past:
- In roughly the middle of Alefgard, northeast of Rippleport, you'll find Tantegel. We'll discuss this castle at greater length below.
- Across the sea from Tantegel is the Dragonlord's Castle. This is a straightforward, optional dungeon that is nevertheless worth checking, and we'll have a look at it after looking through Tantagel. (If you don't want to sail all the way around Alefgard to get to this place, just Zoom to Tantegel. Your boat will jump to the inner sea, making the trip a snap.)
- In the southeast of Tantagel is a shrine, sitting on a small island. Inside you'll find a man guarding a precious piece of equipment, though you can't claim it until you provide proof of Midenhall's bloodline. If you have the Mark of Erdrick in your inventory he'll allow you to snag Erdrick's Helm, a great item to equip on the Prince of Midenhall.
- In the rear of the shrine we just discussed is a teleportal that will send you to a sort of teleportal hub. Just outside the hub, sparkling to your right, is the Sun Sigil. Don't forget to grab it! The other teleportals send you all over the world, and with the Gold Key you can fully check them out... though they just lead to various shrines, most of which you've visited before. All of them are sort of pointless now that you have the Zoom spell and the boat.
- There are a pair of linked tunnels on the east side of Alefgard. In Dragon Quest this path served a purpose, but now it just seems to exist for competion's sake.
Head to Tantegel once you're done exploring the continent.
Tantegel
The castle town of Tantegel has seen better days, though there are still things to see and do while you're in the area:
- To the right of the entrance is an old man who will 'bless' the party. In truth this does nothing to help you, so don't walk away expecting your health to be full. Do that at the Inn, in the southwest of town.
- North of the old man is the Church. You can save and receive the normal array of holy boons within.
- To the left of the entrance is a man who will speak of a sunken treasure, the same as mentioned by the man in Rippleport. He'll tell you that the treasure is north of Rippleport, and if you Zoom to Rippleport and check directly north of the town you'll eventually find Sunken Treasure in the water. You must speak to the guy in Tantegel to make it appear. Take this back to the man in Rippleport - he's behind the Silver Key door near the dock - and he'll give you the Echo Flute. This can be used to determine if your current location has a Sigil. (If you're using a guide you kinda don't need it, but... whatever.)
- In a home in the middle of Tantagel is a man who claims to be good at removing curses. Keep him in mind should you ever wind up cursed.
- The Item Shop is in the south, and the Weapon Shop is in the northwest. The Item Shop is the same as in Rippleport, while the Weapon Shop has a few new items you may want to grab, notably the Sledgehammer and the Iron Helmet.
- On the second floor of the Weapon Shop is a Gold Key door. Beyond it you'll find the King of Tantagel, who is disguising himself rather poorly. He'll give you the Soul Sigil, another vital item for your quest.
- In the north of Tantagel is a draper's shop, behind a Silver Key door. The woman inside while provide a hint for locating the Celestial Skein, which we picked up earlier in the northern tower of the Dragon's Horns.
The only item you have to get here is the Soul Sigil. With that in hand you won't need to visit Tantegel again, though if you decide to visit the next, optional dungeon, you'll likely need to use Tantegel's Inn a few times.
Dragonlord's Castle - Enemies
- Cobra Kaiser - 38 HP - Drops Holy Water
- Dragonfly - 40 HP - Drops Banishing Bell
- Goregon - 26 HP - Drops Holy Water
- Gremlin - 60 HP - Drops Chimaera Wing
- Mummy Boy - 46 HP - Drops Plain Clothes
- Sabrecat - 25 HP - Drops Copper Sword
As with everything in Alefgard, the Dragonlord's Castle is substantially smaller in Dragon Quest II than it was in the original game. Coming down here is entirely optional, though you'll miss out on a solid item if you skip past the remains of the castle.
Progression through the Dragonlord's Castle is simple. Make your way to the fourth basement and you'll gain access to two sets of stairs. The upper stairs that lead down will take you to the end of the dungeon, where you just need to go clockwise around the area. There are a few things of note as you descend into the depths of the Dragonlord's Castle:
- If you take the lower, upward-facing stairs in the fourth basement you'll eventually make your way up to a chest containing Erdrick's Sword. Though this is not the most powerful weapon in the game, as it was in Dragon Quest, it's still a solid weapon for either Midenhall or Cannock. Given it has basically the same combat strength as the Sledgehammer, a Midenhall-only weapon, you may want to give Erdrick's Sword to Cannock.
- On the final floor of the castle you'll see a treasure room north of the entrance. In front of it is an antechamber with damaging blue floors. These will demolish your team's health with each step, and you'll need to heal at least every two steps to survive the trip through this room. The chests contain 151 gold, 913 gold, Full Plate Armor, and a Seed of Strength. In order to open this room you'll need the Silver Key, so don't bother coming down here if you didn't get it. (This room requires the Gold Key in earlier versions of the game.)
At the bottom of Dragonlord's Castle you'll find the Dragonlord's grandson. He will tell you about the five Sigils, spread throughout the world, that you'll need to collect to defeat Hargon. You don't have to speak to him to gather the Sigils, so if you're just interested in collecting the items from the chest you can Evac out of the dungeon once you've raided the treasure room.
Dirkandor
In the east of the world map, sitting off by itself, is a large island with a kingdom upon it. There are two ways to reach the island:
- First, you can simply sail there. If you take this route you'll need to circle around the island to the west side, as the rest of the approach is surrounded by mountains. There's an inlet in the west where you can hop off of your ship.
- Or, second, you can get there by teleportal. If you head to the shrine to the south of Midenhall you'll find a Gold Key door. Pop it open and you'll find a teleportal that will zip you straight to the kingdom.
Regardless of how you reach Dirkandor, you'll enter via the inner walls. You can now have a quick look around before addressing the King of Dirkandor, who will force you into a battle.
- The teleportal puts you on the west side of Dirkandor, inside the walls, and next to the teleportal is a Gold Key door. It will put you behind the desk of the Weapon Shop. Check the chests back here for a Divine Dagger and the Tectonic Plate. The Tectonic Plate is an excellent piece of equipment for the Prince of Midenhall.
- Speaking of the Weapon Shop, it carries, among other things, Magic Armour. Magic Armour is great at warding off spell damage from enemies. The Bank is also located in this little shop.
- If you speak to the priest in the Church he'll reveal the function of the Echo Flute, if you picked up earlier but didn't know what it was for.
- On the west side of Dirkandor is a soothsayer who will tell you that something important is waiting in this very castle. North of him is a soldier trapped in a jail cell whom you can free with the Jailor's Key.
If you've been following the guide up to this point you'll have four of the five Sigils that you need to complete the game. Now is as good a time as any to grab the fifth, and with all that sidetracking you should be more than prepared to overcome the challenge.
The Lighthouse - Enemies
- Deadnaut - 65 HP - Drops Tombola Ticket
- Dragonfly - 40 HP - Drops Banishing Bell
- Goregon - 26 HP - Drops Holy Water
- Gremlin - 60 HP - Drops Chimaera Wing
- Mummy Boy - 46 HP - Drops Plain Clothes
- Orc Chieftain - 100 HP - Drops Banishing Bell
- Sabrecat - 25 HP - Drops Copper Sword
- Sekerleton - 40 HP
- Shaman - 40 HP - Drops Banishing Bell
- Somnol Ant - 14 HP - Tombola Ticket
The fifth and final Sigil is located at the Lighthouse. Zoom to Tantagel, hop onto your boat, and sail south of Alefgard. There's a small island located just off the coast of the continent to the south, close to the two linked shrines near Moonbrooke. The Lighthouse is sitting on this island.
Welcome to the first of the 'hard' areas in Dragon Quest II. The Lighthouse is a minor nightmare to navigate, thanks in large part to a significant number of samey staircases that lead to nowhere. If you don't know the exact route through this place you'll likely be stumbling around for a long time.
Here are guidelines for reaching the top of the Lighthouse, complete with directions to treasures:
- Walk counterclockwise around the entirety of the first floor, until you find a break in the walls in the southwest. Use these to reach the east side of the blocked-off area in the middle of the Lighthouse. There's a gap in the wall to your left that you can enter to find four chambers, each containing stairs. North of these stairs you'll find a chest containing 556 gold.
- If you go up the southeastern set of stairs from the set of four stairs you'll eventually come to a chest containing a Chain Sickle. This is not worth the effort at this point in the game.
- Take the southwestern stairs from the cluster of four staircases. Keep climbing until you reach a floor with stairs on your left and a passage to a locked door on your right. Go up the stairs.
- There are paths leading north and south on the next floor. If you go south you'll find a chest on your right containing 592 gold. Go up the stairs to the left, then head east. Keep using the stairs beyond this point and you'll eventually wind up at a chest containing a Seed of Life.
- Whether you got the two chests or not, go north of the chest that contained the gold coins. There are stairs to the left and right. Take the stairs on the left. (And be careful not to fall off of the Lighthouse.)
- Follow the path east to another set of stairs. At the top you'll find a door that you'll need the Gold Key to open. Go northwest on this floor to find more stairs.
- You're now near the top of the tower, and you should be especially careful not to fall off as you walk around. Head east, then south, and you'll spot a Gremlin on your right. Follow it when it flies off to the south and you'll find an old man who claims to know where a Sigil is located. Follow him to the southwestern-most stairs.
There are two friendly NPCs you can speak to while in the Lighthouse, and both have important information. The first is out front, and he'll speak of the Sigils. The second is at the top of the Lighthouse, accessible by the southwestern stairs in the cluster of four in the middle of the first floor, and he'll speak of Hargon's land of Rendarak. You'll need the Gold Key to reach the second soldier, and he's ultimately not worth the climb.
Shrine of Rubiss
Now that you've conquered the Lighthouse you can put the Sigils to use. Travel to Midenhall, jump in your boat, and sail south. Between Midenhall and Dirkandor - and a little to the left - is a tiny, single-square island. Hop off and enter the island's shrine. After climbing down a bunch of watery steps you'll find an open area.
Step onto the central tile with the five Sigils in your possession and you'll trigger a cut scene. You won't notice an immediate change, but if you check the inventory of your party members one of them will have received the Eye of Rubiss. This is a necessary item for getting through the final dungeon of Dragon Quest II. (For now, though, you can safely stick it in the Bank.)
You're drawing close to the final dungeons of the game. To get at them, however, you'll need to track down a specific item.
World Map - Slewse Region - Enemies
- Drackmage - 10 HP - Drops Oaken Club
- Headhunter - 65 HP - Drops Iron Lance
- Magic Marionette - 60 HP - Drops Prayer Ring
- Sorcerer - 55 HP - Drops Cloak of Evasion
- Terrordactyl - 45 HP - Drops Chimaera Wing
Sail to the southwest of the world's largest continent, just south of the two shrines near Moonbrooke. When you approach land you'll discover an absolute mess of geography, with bridges, rivers, and mountains making the approach to the next town a nightmare. This path will get you there:
- There are two thin rivers that snake north. Enter the western-most river and follow it north. You should see a bridge on your right if you took the correct river.
- Follow the river until you reach the northern-most point. Debark onto land to your left.
- Head into the brown hills and follow them east. If you stick to the north as much as possible you'll run into enemies from the adjoining area rather than the tougher foes local to this area, which is a bit of a blessing.
- Eventually you'll see a forest on your left. Head through it, then south to hills, and then west. You'll reach the town of Slewse after a few more steps.
Unless you come here at high levels - say, 30+ - this walk is a bit brutal. Be prepared to heal often, as you'll be getting into battles on a way-too-regular basis.
Slewse
Ahh, safety. Slewse is more important a town than it looks, and you should absolutely have a look around before proceeding with the main quest.
- The Church is right by the entrance. The chances are good you'll need to use it.
- In the southwest you'll find the Weapon Shop. Everything here should be familiar, save for the Falcon Blade. These weapons have poor attack strength, but they hit twice per round. Falcon Blades are perfect if you want to hunt Metal Slimes, which always take one HP of damage when struck.
- The Inn is in the north of town, and attached to the Inn is an Item Shop. Nothing special here.
- In the center of Slewse is a house, locked by a Gold Key door. Inside you'll find Don Calico, a weaver of great skill. If you bring him the Celestial Skein (Dragon's Horns, northern tower) and the Subtle Shuttle (northern shrine in Zahan, requiring the Jailor's Key) he'll set to work. Go sleep at the Inn once you've handed over the items and, when you return the next day, Don Calico will give you the Flower Dress. All three of your characters can equip the dress, though it is best given to the Princess of Moonbrooke.
Now for the main event. Check the grass on the north end of Slewse and you'll discover that the town extends a bit further in this direction. On your left you'll find the sluise control building. Pop inside the door and you'll find a lock that controls the canal hereabouts. If you picked up the Floodgate Key from Roge Fastfinger in Burrowell you can use it on the lock, which will open the path to a nearby dungeon via the world map. Zoom to Slewse to relocate your boat and you can walk south of Slewse to reach said dungeon.
(Also, throw the Floodgate Key in the Bank the next chance you get. It is now useless.)
Tower of the Moon
Enemies
- Bloody Hand - 60 HP - Drops Copper Sword
- Gargoyle - 60 HP - Drops Iron Helmet
- Ghoul - 70 HP - Drops Chain Sickle
- Headhunter - 65 HP - Drops Iron Lance
- Heyedra - 50 HP - Drops Iron Armour
- Liquid Metal Slime - 5 HP - Drops Mad Cap
- Magic Marionette - 60 HP - Drops Prayer Ring
- Mummy - 75 HP - Drops Holy Water
- Orc Chieftain - 100 HP - Drops Banishing Bell
- Terrordactyl - 45 HP - Drops Chimaera Wing
- Walking Corpse - 90 HP - Drops Prayer Ring
- Whackolyte - 67 HP - Drops Wizard's Staff
The Tower of the Moon plays similarly to the Pillar of Winds, albeit with more ground to cover and much stronger monsters. Of particular note in here are the Liquid Metal Slimes, which are stronger versions of Metal Slimes. They're harder to kill, but provide a whopping 10,150 experience. The Falcon Blades you can purchase in Slewse will make Liquid Metal Slime hunting quite a bit easier, though be prepared to go through a lot of random battles before you run into any of these guys.
Despite all the fakeout stairs the path through the Tower of the Moon is pretty straightforward, even without directions. Still, we need to discuss the path a bit:
- In the first floor's northwestern chest you'll find a Seed of Strength. Go up the nearby stairs.
- In the north of the second floor you'll find a chest containing a Seed of Magic. Go down the stairs in the southeast of the second floor to find a chest containing a Seed of Resilience.
- Go up the stairs in the middle of the second floor. To the north on the third floor are stairs to the fourth floor. South of the entrance to this floor are chests containing 266 gold and a Seed of Resilience. East of the entrance are stairs to use.
- On the fifth floor you'll find two doors and two sets of stairs. Use the stairs outside the doors to climb to the roof, where you'll find a chest containing a Prayer Ring.
- Return to the fifth floor and go through one of the doors, then down the stairs beyond. Go down several floors and you'll eventually come to an old man, who will provide a hint, and a chest. The chest contains the Moonshard, which you need to advance along the main quest.
Once you have the Moonshard you can use Evac to zip out of the Tower of the Moon and continue your journey. (Though if you want to level this is a great place to do it, whether you run into Liquid Metal Slimes or not.)
Now that you have the Moonshard you can proceed to one of Dragon Quest II's tougher dungeons. Zoom to Zahan, way in the southeast of the world map, and start zig-zagging your way to the northwest. You'll sail past the teleportal hub from earlier in the game and, eventually, find an island surrounded in craggy rocks. Position your boat near the south end of the island and use the Moonshard to remove the rocks. This will grant you access to the next dungeon.
Sea Cave - Enemies
- Bloody Hand - 60 HP - Drops Copper Sword
- Chasmonaut - 72 HP - Drops Thanatos' Shield
- Heyedra - 50 HP - Drops Iron Armour
- Hunter Mech - 70 HP - Drops Steel Broadsword
- Liquid Metal Slime - 5 HP - Drops Mad Cap
- Magic Marionette - 60 HP - Drops Prayer Ring
- Miasma - 50 HP - Drops Cloak of Evasion
- Mummy - 75 HP - Drops Holy Water
- Orc Chieftain - 100 HP - Drops Banishing Bell
- Striking Sabrecat - 80 HP - Drops Iron Spear
- Treevil - 63 HP - Drops Holy Water
- Whackolyte - 67 HP - Drops Wizard's Staff
With more fakeout staircases than any other area in Dragon Quest II, the Sea Cave is a royal pain in the butt - if you aren't following a guide. Once you know where to go it isn't so bad, so long as you're using Safe Passage to avoid the big patches of lava.
These directions will get you through the Sea Cave with a minimum of hassle:
- You'll start off on a tiny island in the middle of lava. Use Safe Passage, then walk north and west. You'll find a dead end with a chest containing 1,207 coins.
- Head back to the entrance stairs, then south, then west. In the second room to the north along the next hallway you'll find a chest containing a Seed of Magic. The stairs to the second basement are south of this chest.
- Just south of the entrance to the second basement is a chest. It's a trap, and should be avoided. Walk west until you're forced either north or south, then go south until you see a soldier on your right. To the right of the soldier is a chamber with a chest. The chest contains a Prayer Ring.
- Go down the stairs beside the chest with the Prayer Ring, then head north in the next corridor. You'll find a shortcut to the north end of the previous area, next to another soldier. Go south to find the main path again, then head west until you see lava. Head north over the lava and go down the stairs on the other side.
- You'll appear near a Gold Key door. Open it up and head west. There are two chests ahead. The first is a Poison trap, while the second, further west, contains a Seed of Strength. Head south of the second chest and you'll see a third on your right, beyond a rock wall. Walk south to get around the wall, then head back north to get at the chest. It contains Magic Armour.
- Head south of the chest containing the Magic Armor. There are three downward staircases here, and you want to go down the first set on your right. You'll appear on the edge of a vast lava field. Head northeast a little ways through the lava and you'll find a chest containing a Banishing Bell.
- Go west from the chest containing the Banishing Bell. Against the west wall you'll find a set of downward stairs. Go down.
This final set of stairs will bring you to the lowest level of the Sea Cave. Follow the main path and you'll run into a pair of Whackolytes that you'll need to defeat. Once you do you can proceed north, where you'll find a False Idol sitting on a pedestal. Snag it, then use Evac to leave the Sea Cave.
Beran
You're now in the home stretch, and your next destination is the final town on the world map. Sail to the southeastern island on the world map and debark on the southwestern coast. Here you'll find Beran. Step inside to register the town, but avoid staying at the Inn. First, make sure you've fulfilled the following requirements:
- Put a Chimaera Wing in the inventory of either Midenhall or Moonbrooke. You can buy them in most Item Shops, including the one in Beran, a little ways south of the entrance. You can safely walk down to buy one.
- Make sure you have either Zahan or Burrowell registered in your teleportation list. If you've been following this guide that will already be done.
Assuming you want to make a side trip, stay at the Inn. When you wake up the next morning Cannock will be stuck in bed, afflicted by a curse from afar. There's only one way to cure him, and that's to procure a special leaf. Jump to either Zahan or Burrowell, then sail to the waters between the two towns. There's a small island at the tip of the peninsula where Burrowell sits, and in the middle of it is a single tree. Inspect it for a Yggdrasil Leaf. You can take this back to Cannock and use it on him (like any other item) to restore his health and put him back in the party.
Why bother with this little quest? Mainly so you know how to find the tree. If you make a return trip to the island with the tree you can find another Yggdrasil Leaf. It will drop a new one as long as you don't already have an Yggdrasil Leaf in your inventory. Until Cannock and Moonbrooke learn the Kazing spell the Yggdrasil Leaf is the only way to revive a character without making a trip to a Church, which is very handy if you don't want to abandon a dungeon-delving excursion.
With all that out of the way - assuming you bothered in the first place - you can now have a look around Beran.
- The Weapon Shop, Item Shop, Bank, and Tombola vendor are all located in the southeast. Convenient.
- In the northeast you'll find a main in a jail cell, surrounded by dangerous yellow tiles. If you dare to speak to him (Safe Passage will remove any chance of pain) he'll tell you a secret about this town.
- Inside the Inn is a soldier who will tell you the location of the Sun Sigil... roughly, anyway. You know this info already if you've been following the guide.
- In the northwest is an old man in a home who will save your game. Next to his house is a girl who will speak of Yggdrasil, which you've already handled.
That's all for Beran, save for the Church in the middle of town. In the rear of the Church you'll find a teleportal, kept safe by a jail cell door and damaging yellow tiles. If you use this teleportal you'll appear in the basement of a small house, surrounded by more damaging tiles. Check the upper-right corner of the house to find a hidden Seed of Agility, then look south of the teleportal to find a hidden exit. It will take you outside, where you'll find a ton of poison. Walk through it to return to the world map.
World Map - Outside Rendarak Region - Enemies
- Bloody Hand - 60 HP - Drops Copper Sword
- Brainy Badboon - 60 HP - Drops Chain Mail
- Drackmage - 10 HP - Drops Oaken Club
- Headhunter - 65 HP - Drops Iron Lance
- Orc Chieftain - 100 HP - Drops Banishing Bell
Once you're back on the world map you'll be one quick walk away from the entrance to Rendarak, domain of Hargon. The only thing standing in your way - floating, rather - is a fiery soul. It demands you have two things in your inventory: The Eye of Rubiss and the False Idol. The False Idol is in the ea Cave, which we discussed before reaching Beran.
If you've been following the guide then you should already have the Eye of Rubiss. If not, you'll need to track down the five Sigils scattered around the world, then take them to a small island shrine between Midenhall and Dirkandor. The Sigils are in the following locations:
- Water Sigil - In a jail cell in Moonahan, accessible via a Gold Key door - defeat two Gremlins
- Sun Sigil - In a teleportal hub, which can be found
- Soul Sigil - Held by the King of Tantagel, behind a Gold Key door on the second floor of Tantagel's Weapon Shop
- Moon Sigil - Held by the King of Dirkandor - you'll need to defeat a Striking Sabrecat to receive the Sigil
- Star Sigil - Held by four Gremlins inside the Lighthouse
With both items in your inventory you'll be allowed to walk west, where you'll find a pool of poison. Walk into it and use the False Idol while standing next to the mountains. This will reveal the entrance to the Cave to Rendarak.
Cave to Rendarak - Enemies
- Berserker - 70 HP - Drops Sledgehammer
- Chasmonaut - 72 HP - Drops Thanatos' Shield
- Dancing Flame - 65 HP - Drops Magic Armour
- Eyelasher - 67 HP - Drops Thanatos' Shield
- Gargoyle - 60 HP - Drops Iron Helmet
- Ghoul - 70 HP - Drops Chain Sickle
- Green Dragon - 90 HP - Drops Sword of Ruin
- Grimlin - 69 HP - Drops Devil's Tail
- Healslime - 20 HP - Drops Tombola Ticket
- Hunter Mech - 70 HP - Drops Steel Broadsword
- Killing Machine - 90 HP - Drops Steel Shield
- Liquid Metal Slime - 5 HP - Drops Mad Cap
- Magic Marionette - 60 HP - Drops Prayer Ring
- Metal Slime - 4 HP - Drops Iron Helmet
- Miasma - 50 HP - Drops Cloak of Evasion
- Mummy - 75 HP - Drops Holy Water
- Orc Chieftain - 100 HP - Drops Banishing Bell
- Orc King - 110 HP - Drops Tombola Ticket
- Silvapithecus - 89 HP - Drops Dragonsbane
- Striking Sabrecat - 80 HP - Drops Iron Spear
- Treevil - 63 HP - Drops Holy Water
- Tyrannodactyl - 82 HP - Drops Mad Cap
- Walking Corpse - 90 HP - Drops Prayer Ring
- Whackolyte - 67 HP - Drops Wizard's Staff
Ready for the ultimate challenge in Dragon Quest II? Although the Cave to Rendarak is not the final dungeon, it is easily the most difficult area to traverse. In addition to a slew of high-level enemies spread over lots of ground, this dungeon is filled with pitfalls that you just can't see coming. Fall into one and you'll probably wind up confused.
Given the significant number of enemies you'll encounter in this cave you'll find your party getting worn down on a regular basis. The best way to mitigate this is to use the Kaboom spell, learned by the Princess of Moonbrooke at level 19. Kaboom will either wipe out enemies in one hit or weaken them enough that Midenhall and Cannock can finish them off in a single hit. Give her a Prayer Ring or two to replenish her MP as needed. Kaboom doesn't work on everything - the Dancing Flames, Killing Machines, and Metal Slimes jump to mind - but most of the time it will demolish the enemy team.
Below are some instructions for getting through the cave in one piece, as well as grabbing all the treasure along the way. Be sure to follow the directions exactly when pitfalls are involved, or you'll find yourself backtracking.
- By the entrance to the dungeon you'll find two sets of stairs. Both of them lead to a basement level filled with poison. Check the southeast of this room to find a chest containing a Seed of Strength. If you check the right-most gravestone in the north of this chamber you'll find a bit of a surprise, though it... he... is not terribly useful.
- Go back to the first floor. The rest of this area is filled with pitfalls that will send you down to the poison chamber. Hug the southern wall and make your way east, to the southeastern stairs. As long as you stick to the walls to the south and on your right you'll avoid the pits.
- The next area loops on itself over and over. Head east (or west) from the stairs and you'll find a hallway with blind hallways on the north and south sides. There are five exits on either side of the hallway, and you want to try the third (middle) exits to find stairs out of here.
- The next area is full of twisting - but obstacle-free hallways. Start by heading east. You'll see a chest in a nearby chamber, and it contains a Tombola Ticket. Further east are stairs, and if you go up them they will eventually deliver you to a chest containing Erdrick's Armour. It's the best piece of equipment you can put on Midenhall.
- Make your way back to the previous series of hallways and head northwest, to the entrance stairs. There's a pool to your left, and beside it is a blind hallway. Head west down this hallway to find stairs. These will lead you to a chest containing a Mad Cap. This fantastic helmet will cut MP expenditure by half. It can be worn by both Cannock and Moonbrooke, though given her access to Kaboom Moonbrooke is by far the better candidate.
- Return to the twisting halls and head north. On your right is a chest containing 1,287 gold. Keep following this path north until you're forced to choose between east and west. Choose west and the path will, after a few sets of stairs, eventually bring you to chests containing a Thanatos' Shield and 596 coins. The shield is cursed, and will prevent its wearer from acting on their first turn, so... don't put it on.
- Return to the previous intersection and go east this time. The stairs ahead will take you to a large room that is absolutely lousy with pitfalls, and one wrong move will drop you into a huge room with stairs in the northeast. If you want to get everything you'll need to drop into this room, then check the southwest corner of the room. One square up and to the right of the wall you'll find a pitfall leading to the Thunderbolt Blade, Midenhall's best weapon. It's great to get... but doing so will also force you back to the entrance of the dungeon. Yuck.
- Trek back to the room filled with pitfalls if you got the Thunderbolt Blade. To walk safely through this room from the first set of stairs you need to go south two squares, west two squares, south to the far wall, east along the wall, and then up to the second set of stairs. Piece of cake, right?
- If you fell and used the stairs in the huge, clear room you'll wind up in the far north of the room filled with pitfalls. The safest path to the exit stairs from here is to immediately hug the northern wall and make your way west. Then head south, hugging the west wall, until you reach the southwestern corner of the room. Keep on hugging the lower wall and head east until you reach the stairs. The path will take a while, but it is your safest, surest route out of this terrible chamber.
- Almost done. This next area has a lenthy series of blind passages, and if you go down the wrong ones you'll be redirected to the beginning. You'll need to head the following directions to get through here:
- East from the entrance
- North, then take a left
- North, then take a right
- East - stick to the lower route to avoid a pitfall - then north and to the right
- Upper-right exit
- North
- North, then northwest
- North
- North
- North, then east
Reach this final branch and you'll find stairs to the east. Climb them to emerge outside. You made it! Well done!
World Map - Rendarak Region - Enemies
- Archdemon - 230 HP - Drops Prayer Ring
- Batmandrill - 138 HP - Drops Wailer's Mail
- Cyclops - 115 HP - Drops Banishing Bell
- Frostburn - 92 HP - Drops Wizard's Staff
- Gigantes - 175 HP - Drops Sword of Ruin
- Killing Machine - 90 HP - Drops Steel Shield
- Silvapithecus - 89 HP - Drops Dragonsbane
Welcome to Rendarak, home of monsters. You've almost reached the end of the journey, and there's only one dungeon left. It also happens to be quite a bit easier to navigate and complete than the Cave to Rendarak, so if you've made it this far you can beat Dragon Quest II.
Head northeast of the dungeon's exit, healing whenever you take damage in battles. You're very close to a save point, and you don't want to die before you reach it. Take no risks. Across a bridge you'll find a tiny shrine, and the priest here will fully heal your team along with saving your game. This shrine is the one non-town location you can use Zoom or a Chimeara Wing to reach, so you'll never need to go through the Cave to Rendarak again. If you step on the teleportal here it will send you back to the tiny house on the outskirts of Rendarak.
If you somehow managed to get this far without reaching level 30+ you should consider sticking by the shrine and leveling for a while. The Archdemons in this area give a heap of experience and aren't too rare, and have a small chance of dropping a valuable Prayer Ring. Kaboom continues to be your best friend as far as frying enemies goes, and you can jump into the shrine and fully restore your party whenever your MP gets low. Once you reach the low 30s at a minimum you'll be ready to proceed.
Head west from the shrine, then north into the sizable forest that stretches along the outside of Rendarak. Head west through the forest until the mountains force you south. You should see a pair of connected towers to the east of you. Continue south through the forests until you see a small cluster of hills to the north. Walk across these hills and you'll reach the towers...
Midenhall
... and find...? Huh. Well then. Midenhall is, for some reason, more or less the same as you left it... though everyone seems very high on Hargon. Confusing. You can use the Inn and Item Shop, as normal, but the chests in the vault are all empty and the teleportal doesn't send you anywhere. This appears to be a dead end...
... at least until you use the Eye of Rubiss, which you should still have in your inventory. This dispels the illusion masking the true shape of this place, which is actually a dungeon. You'll need to use the Eye of Rubiss every time you leave the towers, as the illusion of Midenhall will reassert itself.
(Also, in case you didn't notice, sleeping at the Inn doesn't restore your health, and items you bought disappear after you dispel the illusion or leave. So don't bother with either.)
Hall of Hargon - Enemies
- Archdemon - 230 HP - Drops Prayer Ring
- Atlas - 250 HP (only one) - Drops Sword of Ruin
- Belial - 320 HP (only one) - Drops Lightning Staff
- Batmandrill - 138 HP - Drops Wailer's Mail
- Berserker - 70 HP - Drops Sledgehammer
- Dancing Flame - 65 HP - Drops Magic Armour
- Frostburn - 92 HP - Drops Wizard's Staffk
- Gigantes - 175 HP - Drops Sword of Ruin
- Green Dragon - 90 HP - Drops Sword of Ruin
- Killing Machine - 90 HP - Drops Steel Shield
- Pazuzu - 250 HP (only one) - Drops Mad Cap
- Silvapithecus - 89 HP - Drops Dragonsbane
- Wrecktor - 180 HP - Drops Lightning Staff
That's more like it. The Hall of Hargon is the final obstacle between you and Hargon, who waits at the top of the tower. It's a much more straightforward journey through here than the Cave to Rendarak, and the enemies for the most part are the same as what you fought there and on the field trip to Hargon's home.
- There are a pair of flame spirits by the throne to the north of the entrance. Speak to one and you'll fight two Batmandrills. Check the wall up and to the left of the throne and you'll find a hidden jail cell door leading to a corridor lined with damaging yellow tiles, and this corridor leads to chests in the northeast and northwest. The northeastern chest contains Wailer's Mail, while the northwestern chest contains a Devil's Tail. Both items are cursed and shouldn't be equipped.
- In the south-center of the corridor leading to the chests is a Gold Key door. Beyond is a damaging floor with floor tiles shaped into a cross in the middle. Stand on the centerpiece of the cross and use the False Idol. This will send you to the second floor of the Hall of Hargon.
- The next few floors are straightforward walks to the exit stairs. On select floors you'll face elite minions of Hargon before reaching the exit. All are stronger versions of their lookalike monsters elsewhere in the Hall of Hargon. On the fourth floor you'll fight Atlas, which will hit hard twice per round...
- ... on the fifth floor, in the northwestern-most doorway, you'll fight Pazuzu, which uses a slew of damaging spells that include the instant-kill move Thwack...
- ... and on the sixth floor you'll face Belial, which can torch your whole party and use Full Heal to restore its health. Just keep attacking and healing until it runs out of MP and can't heal itself.
Once you get past Belial you'll emerge in Hargon's throne room. Use Safe Passage to bypass the surrounding blue tiles, then heal your party and prepare to go toe-to-toe with the final boss.
Hargon
HP: 460
Drop: Mad Cap (very rare)
Unsurprisingly, Hargon is not a pushover. In addition to receiving two attacks per round he can use Kaboom and a fiery breath to damage your party, Sweet Breath to (potentially) put everyone to sleep, and Midheal to restore his HP. Keep Cannock and Moonbrooke healing while Midenhall chips away at Hargon's health, and only have the other two attack if everyone is above 80 HP or so. Hargon's not incredibly hard to defeat, but... you don't want your characters to be too beat up for what's to follow.
Once you take out Hargon you'll have a moment to heal. Be sure to take it, as something very nasty will interrupt you when you try to leave.
Malroth
HP: 1,750
Surprise! Yep, Hargon was just the front man for the true evil of Malroth. A dark god of purest malice, Malroth is easily the most difficult enemy to defeat in Dragon Quest II. In addition to his two attacks per turn and his flaming breath, which hits everyone in the party for upwards of 100 points of damage, Malroth uses Kasap and Kabuff to strip everyone's defenses, or to buff his own. Not terribly complicated, but Malroth hits so hard that your characters will find themselves at low HP throughout the fight.
If you're unlucky - and you typically are - Malroth will use his fiery breath to put everyone in the yellow on a regular basis. Start off the battle by using Kabuff (Cannock) and Kasap (Moonbrooke) to bolster everyone's defenses, as well as to maximize the damage Malroth takes whenever you attack. Malroth will occasionally use Kabuff to restore his defenses, and you need to rip them down again with Kasap the moment this happens.
Beyond that, chip away at Malroth's health with Midenhall while your two casters keep everyone healed with Midheal or Fullheal, and bring defeated characters back to life immediately with Kazing. Unless you're very confident in how things are going Midenhall should be the only attacker, as neither Cannock nor Moonbrooke have enough HP to endure sustained attacks. If they aren't healing or buffing / debuffing, have them Defend. As long as you remain patient, heal as needed, and don't take any chances, you'll win this fight... eventually.
Take down Malroth and you'll have succeeded. Huzzah! With evil banished from the land once more you can set off and explore the world, talking to all the NPCs scattered throughout the towns. Everyone has something new to say, though you will run into some repetition among the more generic townsfolk. No monsters will get in your way as you look around, and damaging tiles will do damage no longer.
(The Dragonlord's grandson and the King of Moonbrooke get my vote for the best characters to revisit. One is goofy, and the other is... touching.)
Head back to Midenhall once you're done revisiting all of the other towns. Present yourself to the King of Midenhall and he'll grant his son a gift of immeasurable value - as well as some fireworks. You've completed Dragon Quest II! Well done!

